Use Case: Google Sheets Mail Database
Best way to learn how to use it is to try it!
Best way to learn how to implement Foxentry into various scenarios is to learn how to do it step by step on easier problems. So We have prepared a Step-By-Step manual on how to use Foxentry with Google Sheets.
For this scenario, you will need a Google Sheet table and Foxentry API project, how to create one you can find here https://foxentry.com/cs/manual/rest-api
-
Create create a new scenario in Make.

-
Choose Google Sheet and find Trigger Get Range Values. This trigger will allow you to check existing dataset in google table.

-
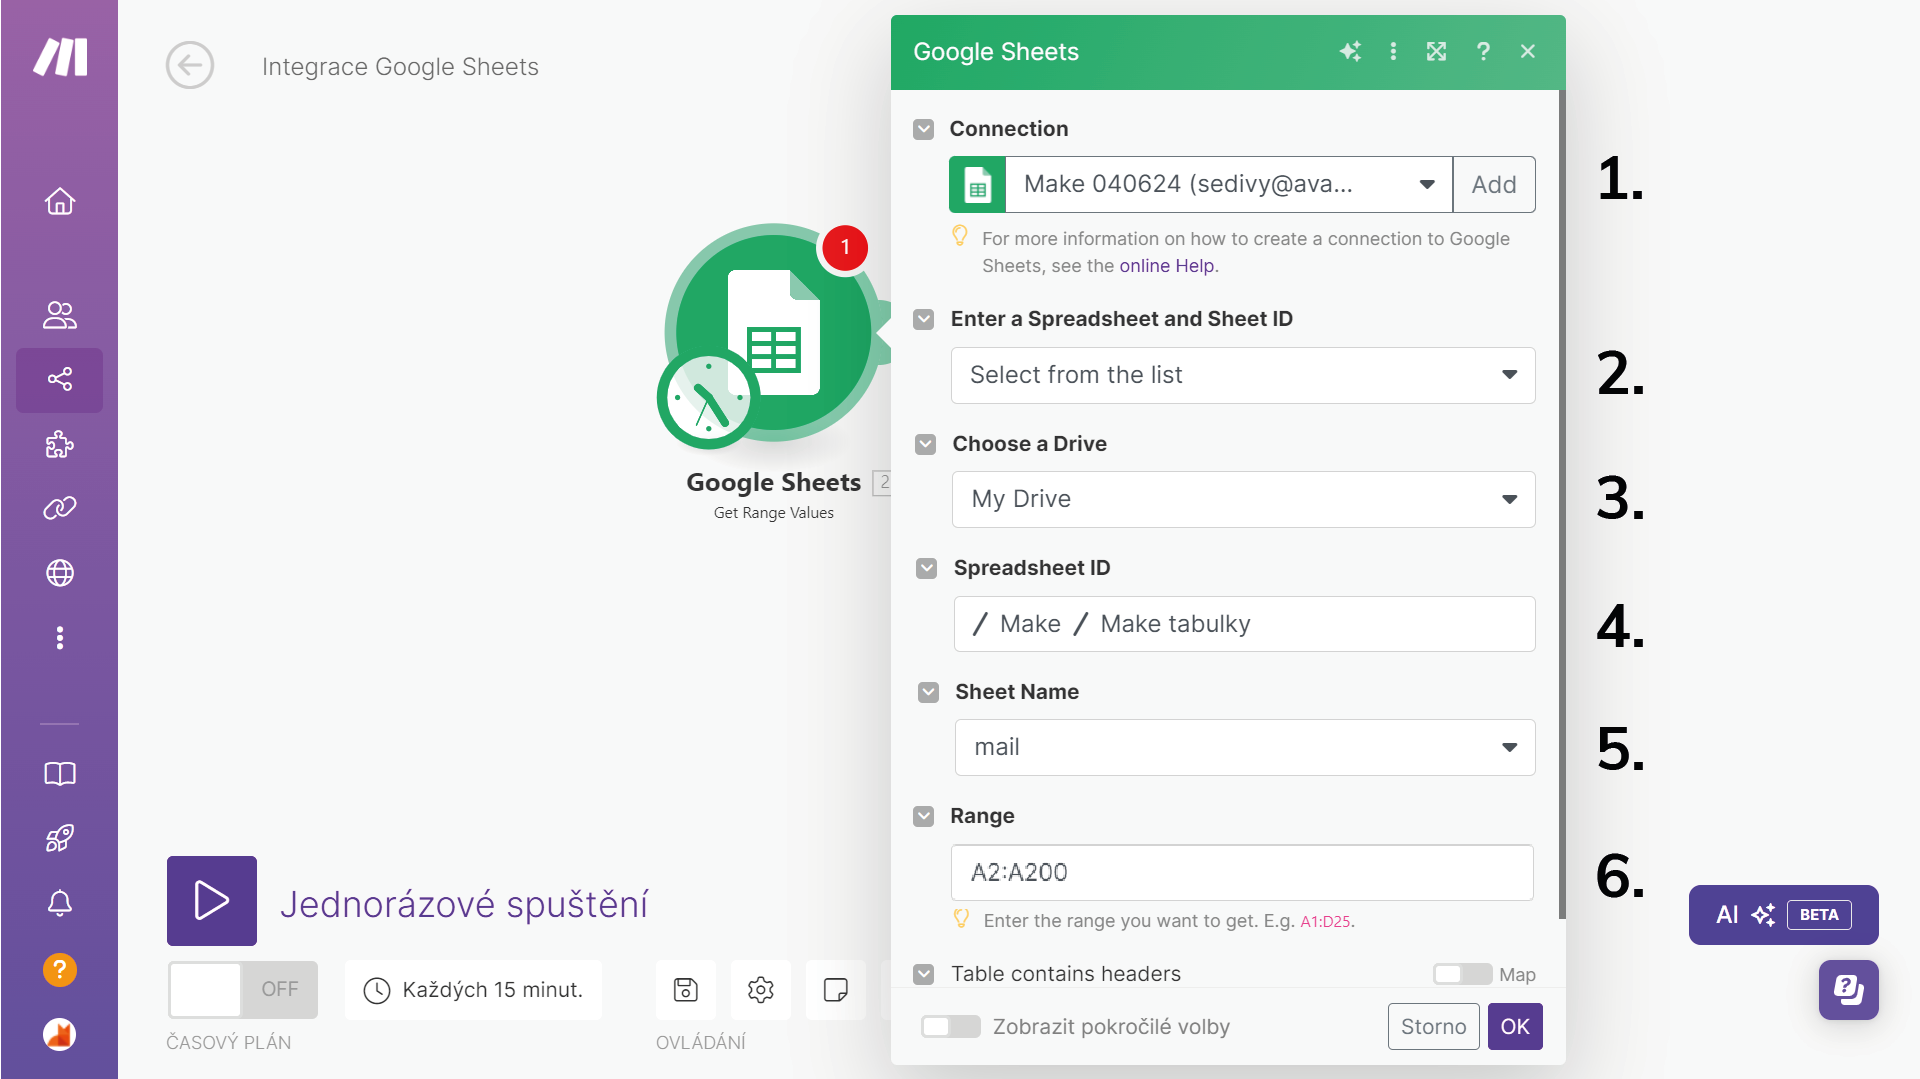
Set your connection to Google Sheets. How to do it - you can find it here https://www.make.com/en/help/app/google-sheets. When you have connected your Google Account to Make (1.). We advise you to use the following settings. (2.) is the way how you identify the correct Sheet document. (3.) is in which disk you should be browsing. (4.) This is the location of your document, the first one is a folder on our testing disk, “Make tabulky” is the name of the targeted document. (5.) is the Sheet/tab in the document. (6.) is the range of the table in which the make operates - If your data which should be validated are starting at row 2. start the range with row number 2. Further down we can set if the table does have any headers, and define them.
-
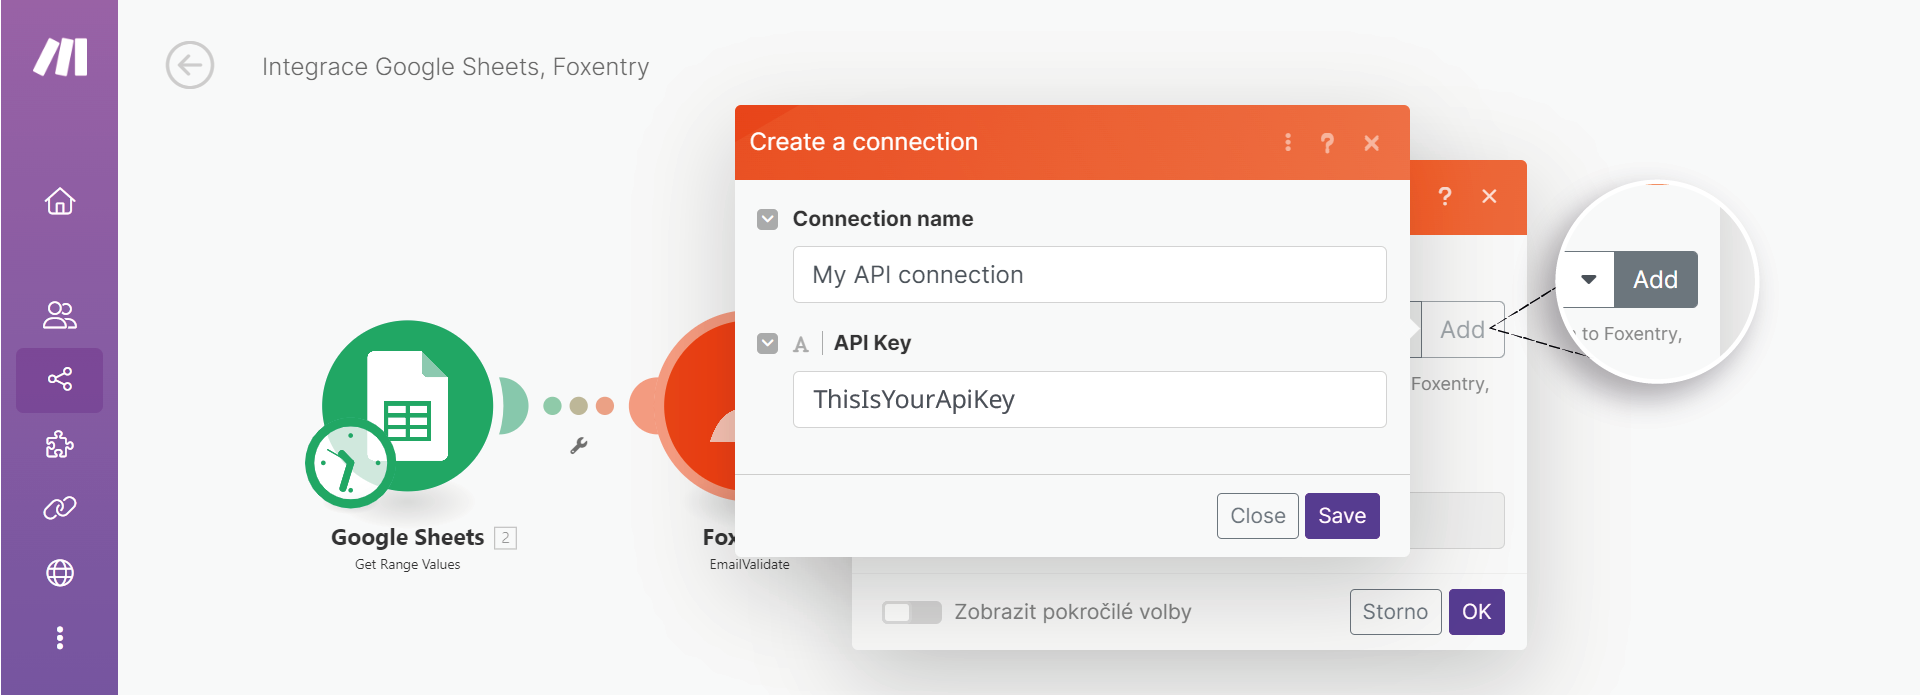
Now we need to add a new module. Find Foxentry App. And connect it to the Foxentry API key. How to create an API project and where to find the REST API key can be found here: https://foxentry.com/cs/manual/rest-api
-
Now you need to choose from where and which data should Foxentry validate and work with. In our case it's collum (A) with header mail.
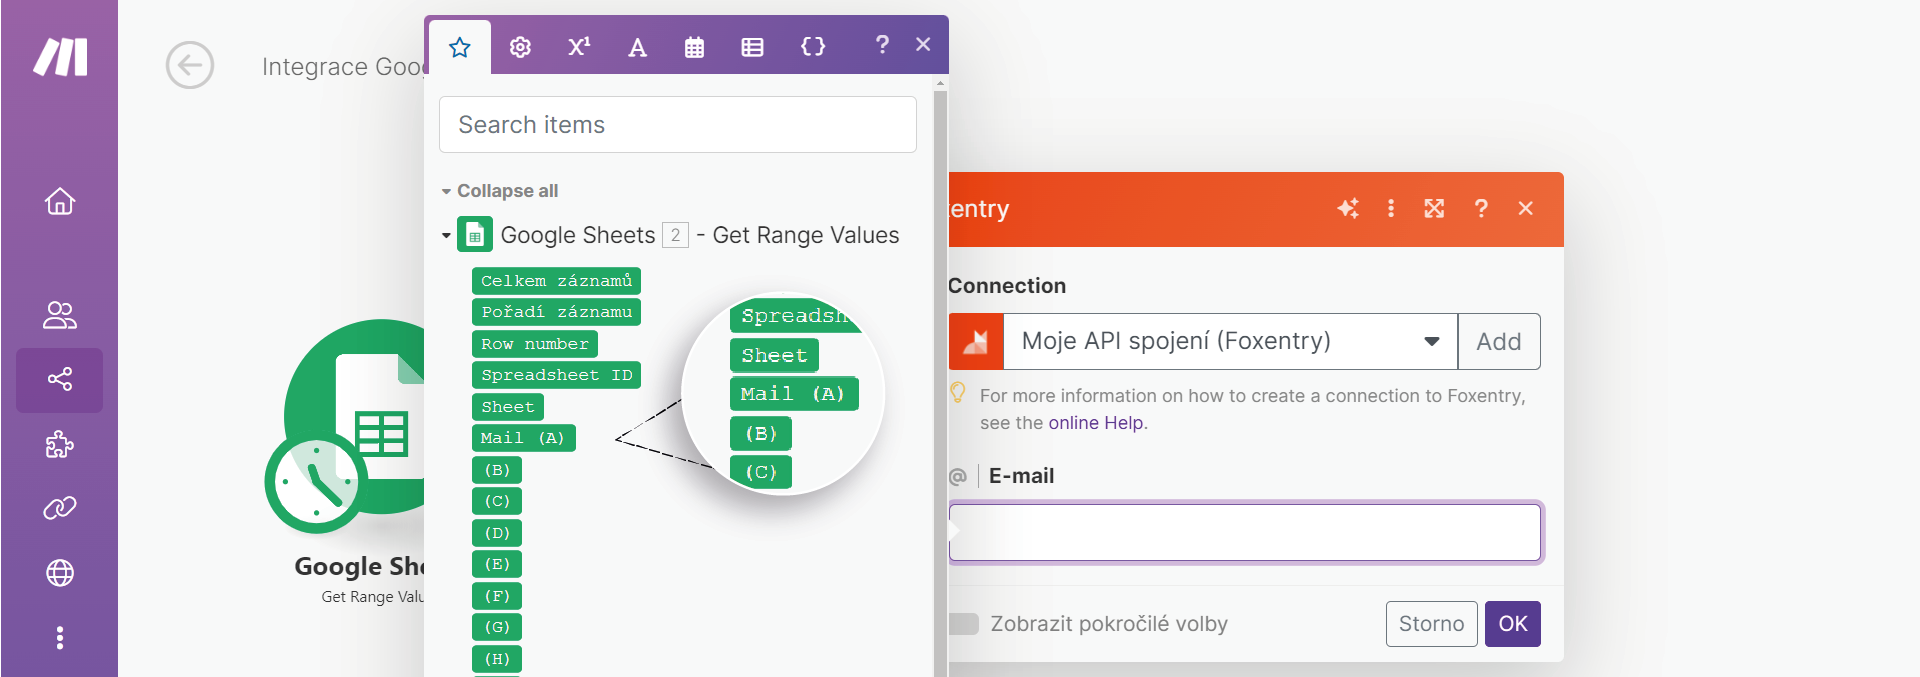
Every Foxentry Action requires a different datascope from you, for further information about datascopes and how to use different API calls - go to foxentry.dev, where you can find additional information about the possibilities and variations you can call and get from Foxentry. Here you are also choosing which validation method you want to use, basic or extended. That varies from the basic format and typos correction to the finding if the email address does really exist or the mail is deliverable or even if the mail is probably created only for this purpose. More information about different types of validation can be found here: https://foxentry.dev/reference/basic-vs-extended-validation
-
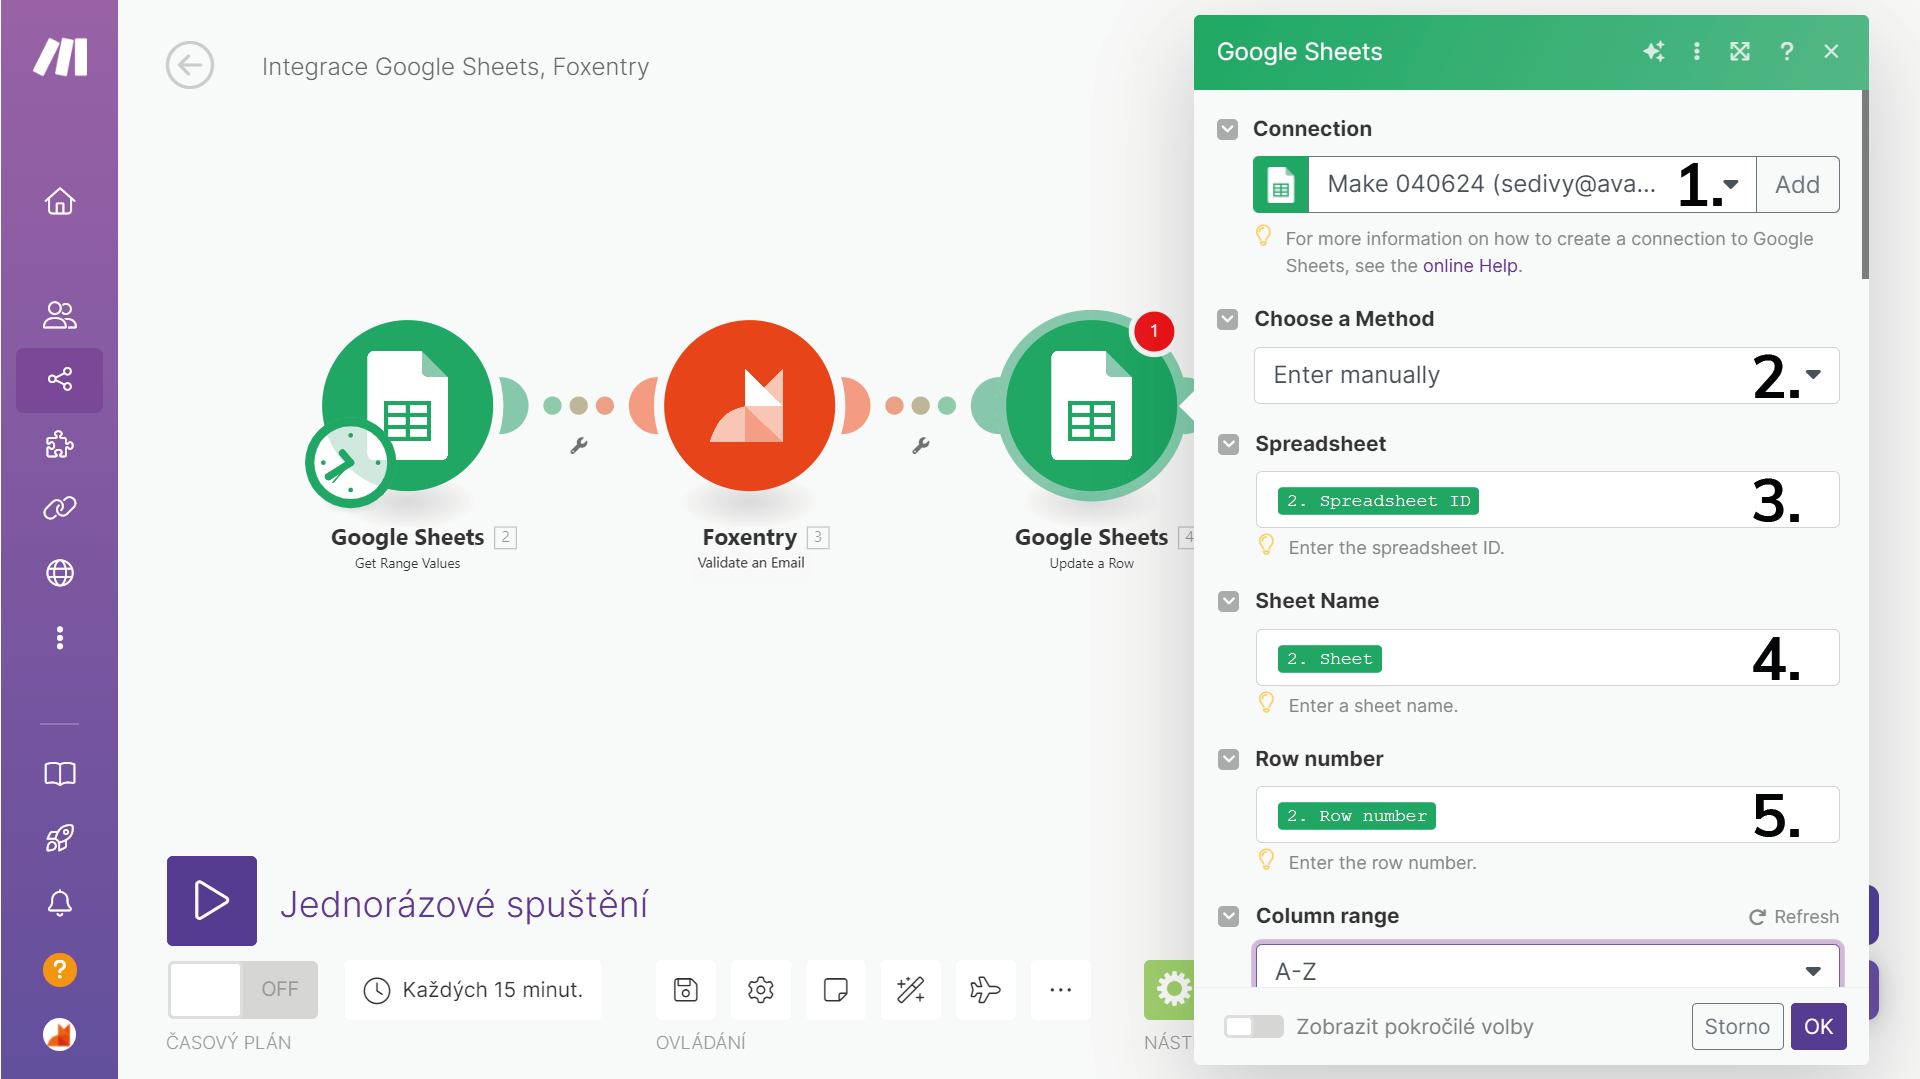
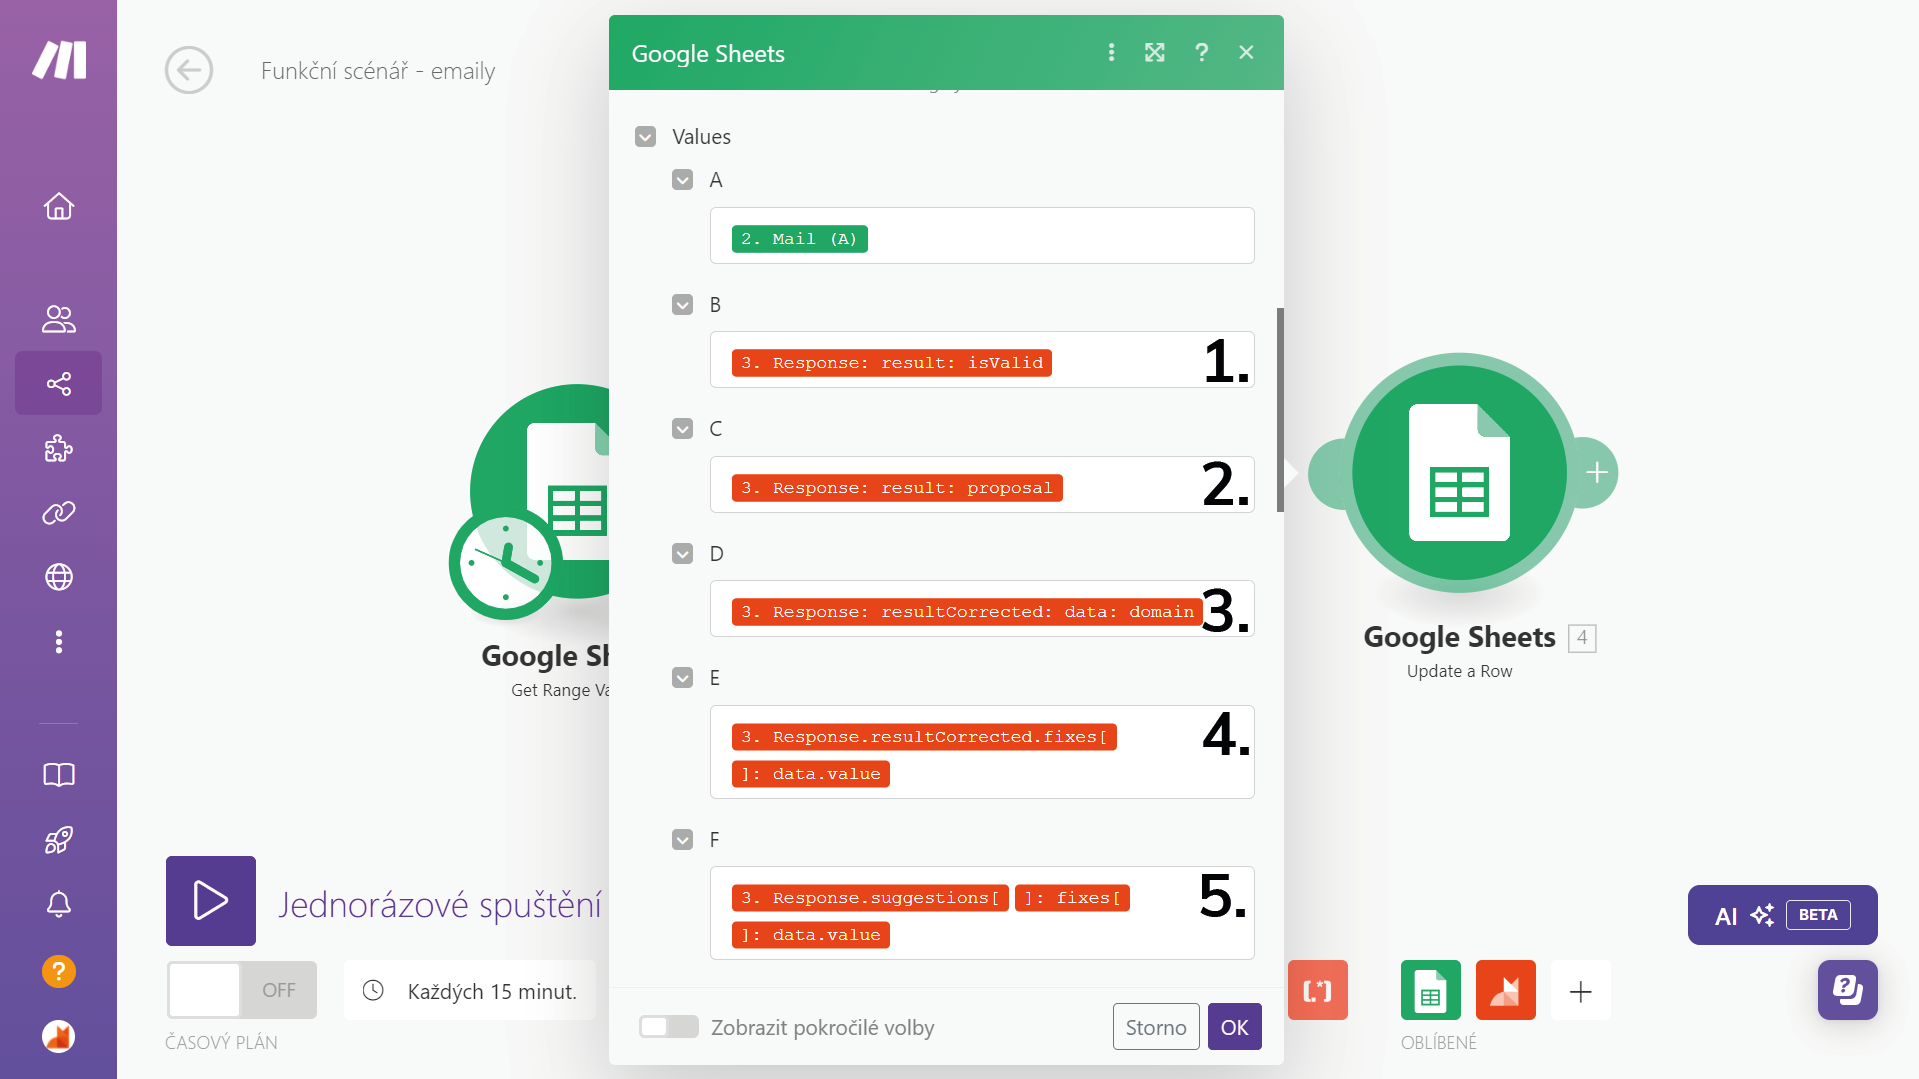
Now when you have connected Foxentry to your Make scenario, you can Add another module. This time we will use Google Sheets - UpdateRow action. (1.) Will be automatically filled with the same Google webhook, as your first module. For (2.) we recommend using Enter manually, which will be the easiest to use if you want your data validated and written down in the same table. For (3.) Spreadsheet us SPREADSHEET_ID. For Sheet name (4.) SHEET option. For (4.) Row number - ROW_NUMBER - that will automatically work with the “data you have had” and work within the same row as your data. If you would like to connect multiple instances of Foxentry Actions - for example - to validate emails, phones and addresses in a same table, you can easily connect multiple Foxentry modules in a line and just always choose which column should be checked for which action.
-
Here is where the magic happens. Now you need to choose which data from Foxentry should be recorded and where. At Foxentry, we aim to provide you with the best customizable experience possible. You can easily modify the outcome of your response data. We will demonstrate one of the possible applications along with an explanation of these settings.
We have set it up to record the information about the validity of the email in column B (1). Foxentry provides a brief overview of any proposed changes and errors detected in the evaluated email, which you will see in column C (2). In column D, we have configured it to write the domain of the email (3). If the email is correctable, you will find the corrected version in column E (4). Some mistakes and typos may seem unusual, but the app will attempt to resolve them regardless. For these cases, a suggestion for the corrected email will appear in column F (5).
-
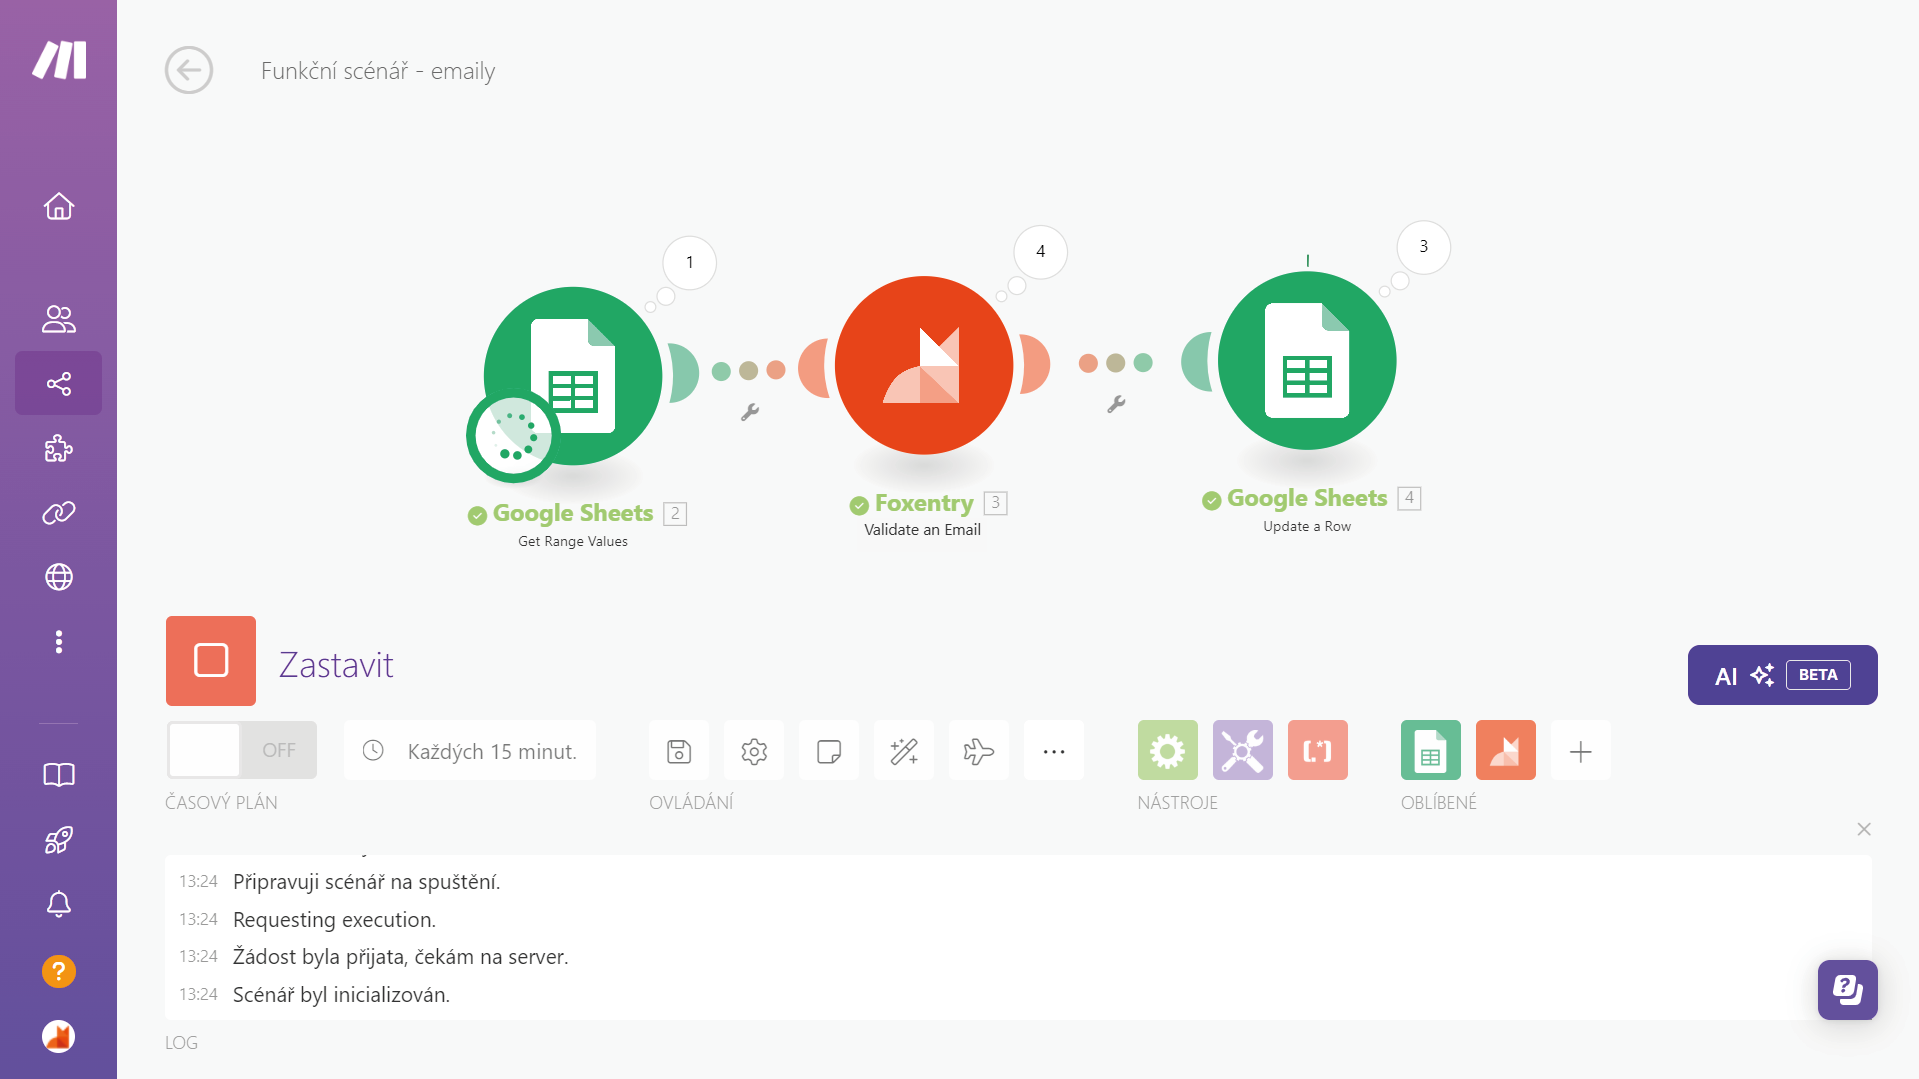
Now click OK and run the scenario. You will see the number of operations completed in your scenario above each modul.
-
In your Google Sheets, you have your validated data ready to go!
Updated 5 months ago